How to Clean Keyboard Tech Repair Guide
How to Clean Keyboard Tech Repair Guide
Table of Contents
Hey there, keyboard warriors and gadget lovers! It’s no secret that keyboards are like the forgotten soldiers of our tech arsenal. They bear the brunt of our intense typing sessions, gaming marathons, and occasional snack breaks. Today, we’re diving into an overlooked topic: how to clean keyboard. If you’re here because your keys have started to stick or simply because it’s been a while since you gave your trusty companion a good scrub, you’re in the right place.
Why Clean Your Keyboard?
Let’s begin with a simple question: when did you last clean your keyboard? If you need help remembering, you’re not alone. A common issue many face is a dirty keyboard, which results from frequent use and can significantly affect the keyboard’s functionality and be a potential health hazard. Keyboards are notorious for collecting dust, crumbs, and even bacteria over time. Not only does this buildup make your keyboard look gross, but it can also impact your performance and health. I once went through a phase where my ‘E’ key decided to go on strike. After some investigation, it turned out that a tiny crumb was the culprit. A clean keyboard isn’t just about aesthetics; it’s about keeping your tech in shape.
When to Clean Your Keyboard
So, when should you clean your keyboard? Regular maintenance is vital, but there are also some telltale signs that it’s time for a deep clean. If you notice any of the following, it’s time to roll up your sleeves:
Sticky or unresponsive keys
Visible dirt or grime
A strange odor (yes, it happens)
It’s been more than a few months since the last cleaning.
Different Types of Computer Keyboard

Before we get into the nitty-gritty of cleaning, let’s first explore the various types of keyboards. Understanding the differences is crucial because each type requires a slightly different cleaning approach. Here’s a closer look at the main types of keyboards you might have:
Wireless Keyboard: If you use a wireless keyboard, remember to turn it off and remove the batteries before starting the cleaning process. This precaution helps prevent damage to the keyboard’s electronic components.
Mechanical Keyboards
Mechanical keyboards are a favorite among gamers and typing enthusiasts. They provide tactile feedback and have individual mechanical switches for each key, making them highly durable and customizable. The keycaps are often removable, allowing for thorough cleaning.
Characteristics of Mechanical Keyboards
Tactile Feedback: Mechanical keyboards offer a satisfying click or bump when pressing a key, making them ideal for those who type a lot or play games.
Durability: These keyboards are built to last, often enduring tens of millions of keystrokes.
Customization: Many mechanical keyboards allow you to change the keycaps, which means you can personalize the look and feel of your keyboard.
Cleaning Tips for Mechanical Keyboards
Since the keycaps are removable, mechanical keyboards are more accessible for deep cleaning.
Be mindful of switch types, as they might have different cleaning sensitivities.
Membrane Keyboards
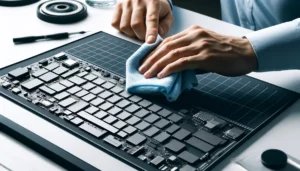
Membrane keyboards are standard and often found in offices or casual computing setups. They use a pressure pad system, making them quieter but less tactile than mechanical keyboards.
Characteristics of Membrane Keyboards
Quiet Operation: Membrane keyboards are generally calmer, making them suitable for office environments.
Soft Feel: The keys on a membrane keyboard feel softer and require less force to press.
Lower Cost: These keyboards are typically more affordable than mechanical ones.
Cleaning Tips for Membrane Keyboards
Membrane keyboards are less robust and can be damaged if water seeps into the pressure pads.
Regular surface cleaning is vital, as removing individual keys is impossible.
Laptop Keyboards

Laptop keyboards are integrated into the device, which makes them unique and sometimes challenging to clean. They often have a low profile, with keys that are closer together.
Characteristics of Laptop Keyboards
Integrated Design: Laptop keyboards are built into the laptop, which makes them compact and space-saving.
Low Profile: The keys on a laptop keyboard are typically flat and close together.
Specialized Layout: Laptop keyboards often have customized layouts, including special function keys.
Cleaning Tips for Laptop Keyboards
Extra caution is needed, as water or cleaning solutions can easily damage the internal components.
Regular dusting and careful surface cleaning can prevent the need for deeper maintenance.
Flipping the laptop upside down can help dislodge crumbs and dust before using compressed air for a more thorough cleaning.
Chiclet Keyboards
Chiclet keyboards, often found on modern laptops and some desktops, have keys that are flat and spaced apart, resembling the shape of chiclet gum. These keyboards are known for their sleek and stylish design.
Characteristics of Chiclet Keyboards
Flat and Square Keys: The keys are flat, square, and usually have rounded edges.
Easy to Clean: The spacing between keys makes them easier to clean than other types.
Modern Look: These keyboards often have a sleek, contemporary aesthetic.
Cleaning Tips for Chiclet Keyboards
The flat design makes it easy to wipe down the surface.
Compressed air can effectively clean between the keys.
Flexible Keyboards
Flexible keyboards are unique in that they are made of silicone or other flexible materials, allowing them to be rolled up or folded for easy transport. These are often used in specific industries where portability and easy cleaning are priorities.
Characteristics of Flexible Keyboards
Flexible and Portable: These keyboards can be rolled up or folded, making them highly portable.
Water-Resistant: The silicone material often makes them water-resistant, ideal for harsh environments.
Quiet Typing: Flexible keyboards are generally very quiet to type on.
Cleaning Tips for Flexible Keyboards
These keyboards can often be rinsed under water, but check the manufacturer’s instructions.
Ensure the keyboard is completely dry before plugging it back in.
Understanding the different types of keyboards is crucial for proper cleaning and maintenance. Now that you know which kind of keyboard you have, let’s move on to the specific cleaning methods for each type.
Preparing for Cleaning
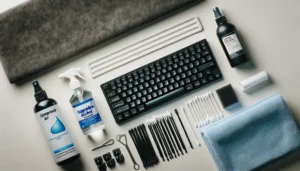
Before you clean your keyboard, it’s important to prepare appropriately to ensure success. This section will cover the essential steps to ensure you have everything you need, including a lint-free cloth, and can avoid any mishaps. Using a lint-free cloth with isopropyl alcohol is crucial for cleaning the keyboard and polishing the keys thoroughly, as it helps avoid damage by not leaving any residues.
Gathering Supplies
First things first: you’ll want to gather all the necessary supplies. You might need different tools and cleaning agents depending on your keyboard type and how dirty it is. Here’s a comprehensive list of items you may need:
Compressed air is ideal for blowing out dust and debris between the keys. It is a handy tool for quick cleaning sessions.
Microfiber Cloth: These cloths are gentle and effective for wiping down the keyboard and other surfaces.
Lint Free Cloth: Essential for cleaning with isopropyl alcohol, a lint-free cloth ensures that your keyboard is polished without leaving any residues behind. It’s crucial for a thorough clean that doesn’t damage the keys.
Isopropyl Alcohol (70% or higher): This solution is excellent for disinfecting and cleaning sticky residue. It evaporates quickly and, when used correctly, won’t damage electronics.
Cotton Swabs: Perfect for getting into tight spaces and cleaning between keys.
Keycap Puller: A small tool used to remove keycaps from mechanical keyboards, making it easier to clean underneath.
Soap and water help wash keycaps or clean the exterior of the keyboard. Ensure the keyboard is thoroughly dried before use.
Cleaning Wipes: Pre-moistened cleaning wipes can be helpful for quick surface cleaning and disinfecting.
Brush: A small, soft-bristled brush can dislodge dust and crumbs between the keys.
Unplugging and Preparing the Keyboard
Once you’ve gathered your supplies, it’s time to prepare your keyboard for cleaning. This crucial step ensures your safety and prevents accidental damage.
Unplug External Keyboards: If you’re cleaning an external keyboard, ensure it’s unplugged from your computer or device. This prevents accidental keystrokes and potential electrical damage.
Shut Down Laptops: If you’re cleaning a laptop keyboard, shut down the laptop and unplug it from any power source. This protects the internal components from damage if liquid spills or seeps inside.
Remove Batteries: For wireless keyboards, remove the batteries before cleaning. This prevents any electrical mishaps and ensures the cleaning process is safe.
Pre-Cleaning Steps
It is helpful to remove as much loose debris as possible before you begin detailed cleaning. This will make the rest of the cleaning process more effective and accessible.
Shake It Out: Turn the keyboard upside down and gently shake it to dislodge any loose crumbs, dust, or debris. If it’s been a while since you last cleaned your keyboard, you might be surprised by what falls out! Additionally, this step helps remove loose particles and pet hair, ensuring a thorough pre-cleaning.
Blow It Out: Use compressed air to blow out dust and debris between the keys. Hold the can at an angle and use short bursts to avoid moisture buildup from the compressed air.
Wipe the Surface: Use a dry or slightly damp microfiber cloth to wipe down the keyboard’s surface, removing any noticeable dust or smudges.
Safety Precautions
When it comes to cleaning electronics, safety is paramount. Here are some essential precautions to keep in mind as you prepare to clean your keyboard:
Avoid Excess Moisture: Water and electronics don’t mix well. Always use a damp cloth rather than a wet one, and avoid spraying liquids directly onto the keyboard.
Use Alcohol Sparingly: Isopropyl alcohol is excellent for disinfecting and cleaning sticky residue. However, it should be used sparingly and with a cloth or cotton swab rather than directly on the keyboard.
Be Gentle: When using brushes or other tools, be gentle to avoid damaging the keys or the underlying mechanisms. This is especially important for membrane and laptop keyboards, which are more delicate than mechanical keyboards.
Creating a Clean Workspace
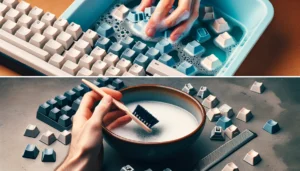
A clean and organized workspace can make cleaning smoother and more efficient. Here’s how to set up your space:
Lay Out a Towel: Use a clean towel or cloth to place your keyboard on. This will prevent scratches and help catch any drips or spills during cleaning.
Organize Your Supplies: Arrange your cleaning supplies within easy reach. This will help you stay focused and avoid unnecessary distractions.
Ensure Good Lighting: Make sure you have good lighting so you can see what you’re doing. This is especially important when cleaning between the keys or checking for grime.
Properly preparing for cleaning will set you up for a successful and stress-free experience. Now that you’re ready, let’s move on to the specific cleaning methods for different keyboards.
Cleaning Methods for Different Types of Keyboards
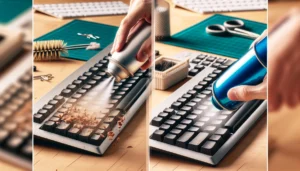
Cleaning a Mechanical Keyboard
Mechanical keyboards built for easy cleaning. Here’s how to do it:
Remove and Clean Keycaps: Use a keycap puller to remove the keycaps gently. Please place them in a bowl of soapy water to soak while you clean the rest of the keyboard.
Clean the Keyboard Frame: Wipe the keyboard frame with a microfiber cloth and isopropyl alcohol.
Reassemble the Keyboard: After the keycaps are dry, snap them back into place.
Cleaning a Membrane Keyboard
Membrane keyboards are trickier since the keys are usually not removable. Here’s the best way to clean them:
Wipe Down the Surface: Use a damp (not wet) cloth to wipe the keyboard’s surface.
Clean Between the Keys: Use a cotton swab dipped in isopropyl alcohol to clean between the keys.
Dry the Keyboard: Use a dry cloth to remove any remaining moisture.
Cleaning a Laptop Keyboard
Laptop keyboards require a gentle touch:
Wipe the Surface: Use a microfiber cloth to wipe the keyboard’s surface gently.
Clean Between the Keys: To clean between the keys, use a cotton swab dipped in isopropyl alcohol. Additionally, a soft brush can gently remove debris from between the keys, enhancing the keyboard’s performance and longevity.
Use Compressed Air: Blow out any remaining debris with compressed air.
Deep Cleaning Techniques
If your keyboard needs a serious deep clean, follow these steps: To ensure a thorough clean, it’s crucial to use techniques that dislodge dirt and check for any remaining dirt, ensuring your keyboard is as clean as possible.
Removing and Washing Keycaps (For Mechanical Keyboards)
Remove Keycaps: Use a keycap puller to remove the keycaps.
Wash Keycaps: Soak the keycaps in soapy water, then scrub them with a brush.
Dry Keycaps: Allow the keycaps to air dry completely before reassembling.
Cleaning Between the Keys
Brush Between the Keys: Use a small brush to remove debris between the keys.
Clean with Alcohol: Use a cotton swab dipped in isopropyl alcohol to clean any stubborn grime.
Cleaning the Keyboard Frame
Wipe Down the Frame: Use a damp cloth or specialized cleaning wipe to clean the keyboard frame.
Dry the Frame: Use a dry cloth to remove any remaining moisture.
Maintenance and Prevention Tips
Regular Cleaning Routine
To keep your keyboard in top shape, establish a regular cleaning routine.
Daily: Wipe down the keyboard with a dry cloth.
Weekly: Use compressed air to remove dust and debris.
Monthly: Wipe down the keyboard with a damp cloth and clean between the keys.
Using Keyboard Covers
Keyboard covers are a great way to prevent dust and debris from getting into your keyboard. They’re handy if you often eat or drink near your computer.
Practicing Good Hygiene
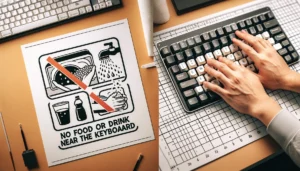
Practicing good hygiene can help keep your keyboard clean. Avoid eating or drinking near your keyboard, and wash your hands regularly to prevent grime buildup.
Conclusion
In conclusion, cleaning your keyboard is an essential part of tech maintenance. Whether a gamer, writer, or casual user, a clean keyboard will improve your typing experience and keep your tech looking great. Following the abovementioned steps, you can keep your keyboard clean and functional for years.
FAQs
How often should I clean my keyboard?
Clean your keyboard at least once a month or more frequently if you use it heavily.
Can I use water to clean my keyboard?
It’s best to avoid water, especially on membranes or laptop keyboards. Instead, use a damp cloth and isopropyl alcohol.
What’s the best way to remove sticky residue from keys?
Use a cotton swab dipped in isopropyl alcohol to remove sticky residue.
Can I clean my laptop keyboard with compressed air?
Yes, but use short bursts at an angle to avoid damaging the keys.
How do I avoid damaging my keyboard while cleaning?
Always unplug your keyboard or shut down your laptop before cleaning. Use gentle cleaning tools and avoid excess moisture.

